Shooting Diamonds on a PopBead BudgetAll of these photos are taken with the Fuji A205 set to its lowest 640x480 resolution (0.3 MP).The first photos are taken in a daylit room with no artificial light. In most cases, the light levels are very low, so a tripod was used.
Here are the DiamondsThese diamonds are a little over 1/4 inch across, and you can see that size is a focusing challenge for the camera's 4" closest focus. The images are reduced to display here. Links to the actual 120K camera images are provided.This was the first shot taken near a window, but in the shadow of a box, so there is no direct light to cast a shadow. 
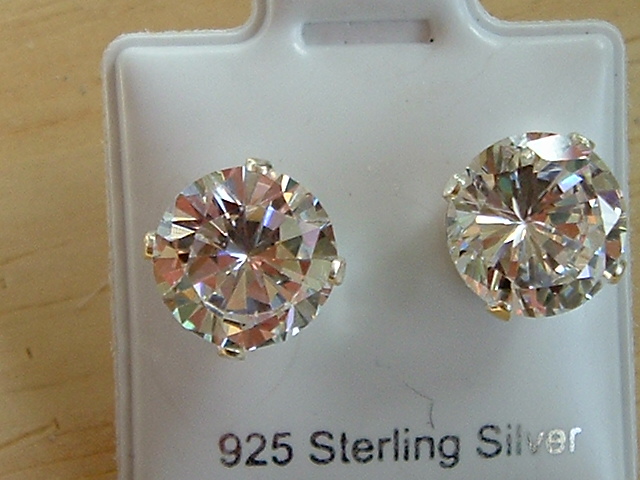
http://www.isdntek.com/demo/camera/diamonds/CZ_WoodIndirectDaylightAutoMacroZoom.jpg Notice that the photo is not centered. My camera focuses on what is at the very center of the frame, so I will make sure that there is a sharp edge there in the middle for the camera to use for focusing. I can crop the image later. If I had left it centered on that white area, the camera would have had difficulty focusing.  These are crystal clear, so where did all that color come from? I shot the diamond straight on because the facets are angled to reflect most when viewed straight on. You are seeing my colored clothing, lots of skin because I am hand-holding the camera with both hands, and in the middle is the black camera. The facets are also picking up all the other colored stuff on the table and walls nearby.
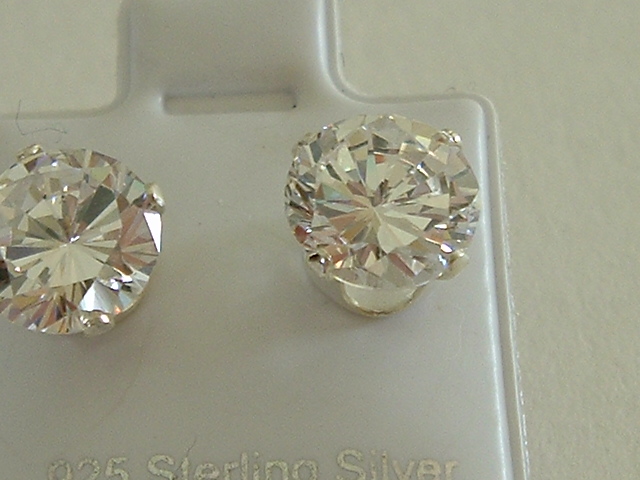
I then moved away from the busy area where I could get a better reflection of white walls. I also shot at a slight angle so as to stay out of the photo. That got rid of a lot of the color, but made a rather drab image. Again, I have not centered the photo because I wanted to focus on an edge of the diamond. When I partially depress the shutter, the focusing brackets will shrink in to the tiny area to be focused, and there had better be something sharp in there. 
http://www.isdntek.com/demo/camera/diamonds/CZ_WhiteIndirectDaylightAutoMacroZoom.jpg 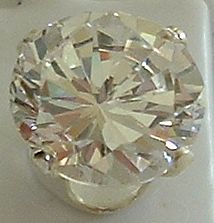
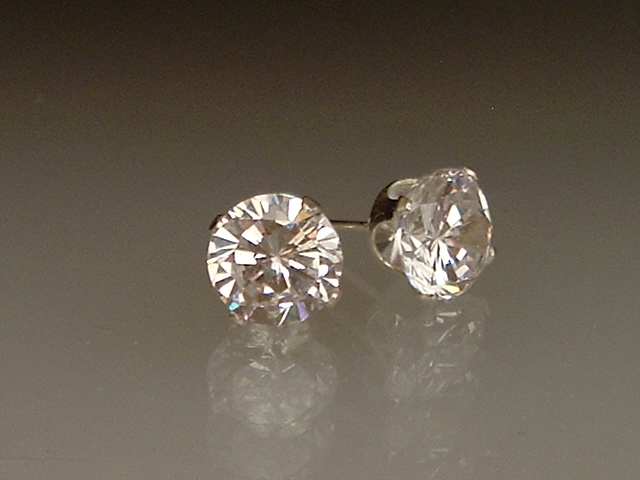
The color is much truer, but how do we get that blah image to come to life? Well, the first problem is exposure. The camera decided there was too much white and darkened the image a little. But aside from that, there just isn't enough character reflecting in the stone. More on that later. Staging and PosingI moved farther away from the window and challenged the camera to get the lighting right - it's still set on auto mode. I also set up the tripod as the light is diminishing.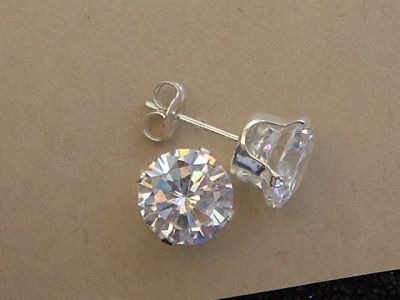
http://www.isdntek.com/demo/camera/diamonds/CZ_TanIndirectDaylightAutoMacroZoom.jpg 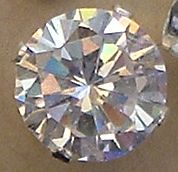
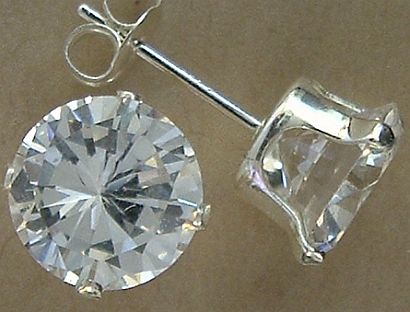
By showing one diamond on its side, you can see that it is clear, while the straight-on shot shows the kaleidoscope effect of the diamond facets. You will also see less of me in the reflections because I am out of the way with the tripod. Of course, we need to try the black background because that usually produces the most dramatic effect, and it does show off the edges very nicely. On the side view, it is much easier to make out the cut and depth of the stone in its setting. 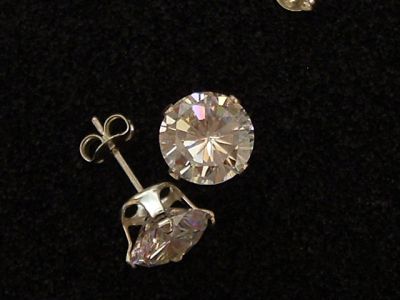
http://www.isdntek.com/demo/camera/diamonds/CZ_blackAutoIndirectDaylightMacroZoom.jpg 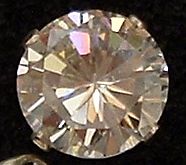
Well, just for fun, I decided to hide the diamond in the dark. It would be hard to describe my light table in a drawer, so for this setup, just envision that the diamonds are sitting on a piece of opaque white paper and the back is curled back over to the front to create a hood. It's pretty dark behind and above the diamonds and most cameras would be screaming for flash, but across the room behind me is a window. That bright spot on the back wall is creating all the brightness on the face of the diamond. 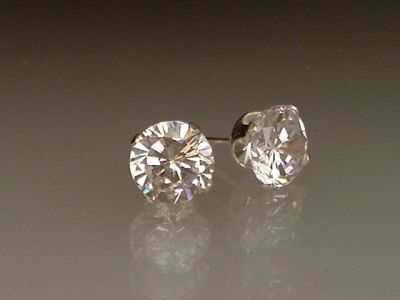
http://www.isdntek.com/demo/camera/diamonds/CZ_InADrawerIndirectDaylightMacroAuto.jpg  It's a rather dramatic effect, but I'm not sure that it displays the diamond all that well. It's somewhat difficult to make out the facets. In fact, the effect produces somewhat the same problem that was displayed earlier in this thread, as I think I may be seeing right through the stone. It does, however, impart the feeling of a crystal clear stone (ice) without adding false colors.
Color ReflectionsNow back to the problem of color. By now you have figured out the diamond will reflect whatever it sees. You can control the color of your diamonds by placing a colored article beside or above your diamond and moving it around until you get the color you want reflecting off the facets. Below is a study in colors. I have used from left to right: stained glass, a stack of colored pencils, black diskettes to the side, even more diskettes cutting off more light, my hand holding a black diskette, and a sheet of white paper.
The white looks pretty good on black and black would have worked very nicely to sharpen that washed-out white photo at the beginning of this post without adding extraneous color. Light QualityI noticed that as the exposure time increased to compensate for the dimmer light, the images also lost a little quality. I believe that has been described as electrical noise by some. So I returned to the shady side of the bright window and got as close as I could to the diamonds to maximize size. (When depressing the shutter halfway, an icon appeared to let me know when I was too close to focus.) 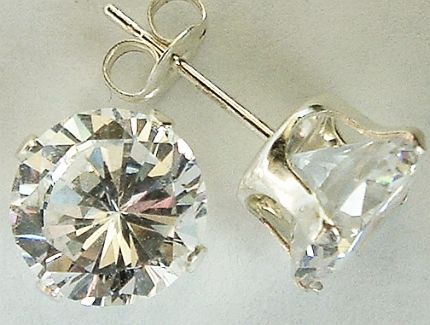
Then to add definition but avoid coloring the stones, I propped a black diskette on the right and white cardboard on the left. I cut a whole through the middle of a white sheet of paper to poke the camera through and hide my hands and clothing (gosh that sounds just like the milkjug trick). I took a black piece of cardboard and moved it around until I got darker facets here and there, and looking straight down I was able to capture the facets on the face and the shape on the side view. Ooops, looks like I picked up a reflection of the blue sky too! 
So where does that leave us? The milkjug method will get rid of the colors introduced by clothing and room, and by placing a couple of black strips of paper inside the milkjug, the facets will pop out. It's getting dark and window light is no longer available, so on to the milkjug method. The MilkjugNot having a milkjug, I found another improvisation. I took a two-liter clear soda bottle and cut off the bottom and the spout at the top. Since I'm shooting straight down, and my macro focal length is 4 inches, I only needed about four inches of the bottle. Then I draped one of those milky plastic grocery bags over the top and taped it in place. I cut a pair of one-inch strips of black newsprint from today's newspaper and pasted them down opposite sides inside. A 50-75 watt lamp was placed on the side away from me with the black stripes of the dome oriented to left and right. The dome acts as both a diffuser and a reflector to soften the incoming light and to bounce it back off the opposite side.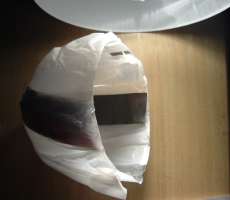
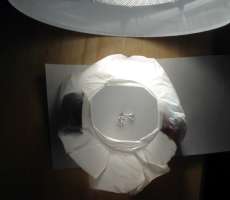
A tripod was used for these shots, but I have had good results with handholding the camera in this kind of bright light, and the dome gives something for the camera to rest on. I switched from auto to manual mode and set the camera to indoor incandescent lighting for the single desk lamp, but the image seemed to flare too much. It looks flashy and might look great on a darker CRT, but if feels a little glarey to me. 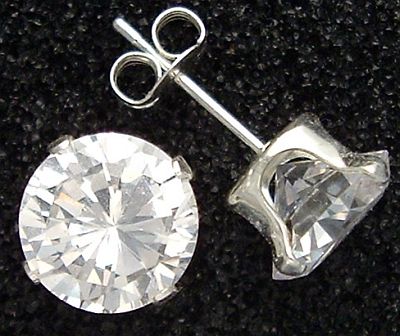
So I changed the camera's exposure compensation (EV setting) down to -1.2, which darkened the image a little and you can see more definition in the facets. However, this may look too dark on older monitors, so perhaps a setting in between (like -0.6) would work best. 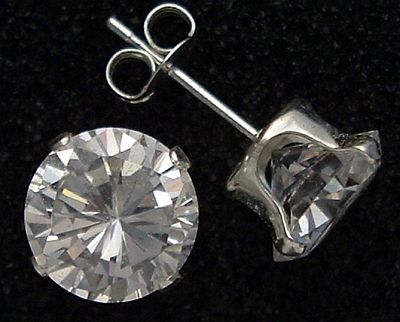
Back to the camera.... And here is a handheld version with an EV setting of -0.6. That should provide a fair idea of the effect of the different settings. Of course, when you use the tripod, your hands are free to move the light around to get the best angle of reflection. 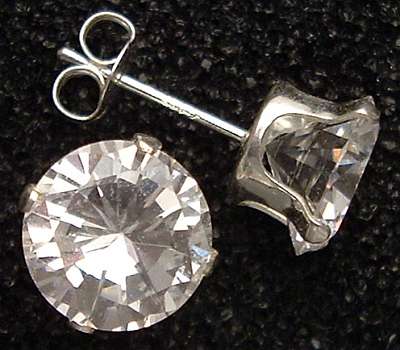
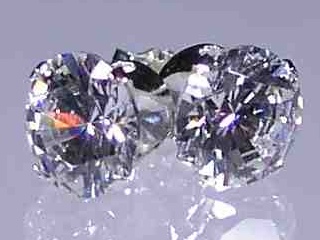
I would say that all of these latter photos fairly accurately represent the diamonds. Photos can't pick up the glitter effect and there are some prismatic colors that disappear under bright lights. Backlighting and SidelightingDiamonds present the same kind of challenge as clear glass. It's often hard to see them because we can see through them. All of the examples above are fairly evenly illuminated. Can we apply the same backlighting or sidelighting that we apply to great photos of cut glass? One would think so, but the difference with the diamond is the beauty is in the direct reflections off the faceted surface, not in the ornate cut design. To illustrate, here are a couple of shots posed as one might pose stemware for backlighting or sidelighting.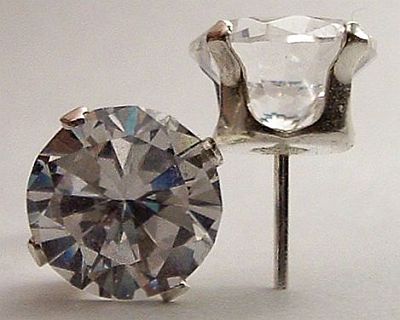
Obviously, the standing stone looks interesting, but the full face is too dark with the backlighting. And when we move the light around to the side, the front has more lighting and we can see the facets pretty well, but we're back to boring. Or is it just a boring background? 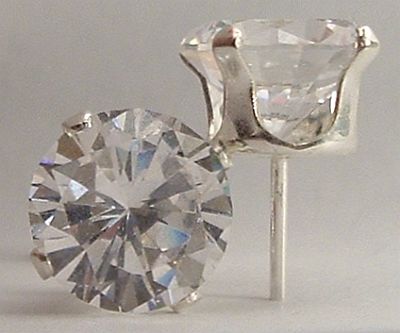
Let's take a look at a black background, since cut glass usually looks pretty good sidelit with a black background. In this example, we can see the black through the stone, and it gives it a little more depth. The sidelighting makes the stone glow and the background fades into the distance. It's an interesting presentation with character, but overall, the image of the stone is not any better than the milkjug images. 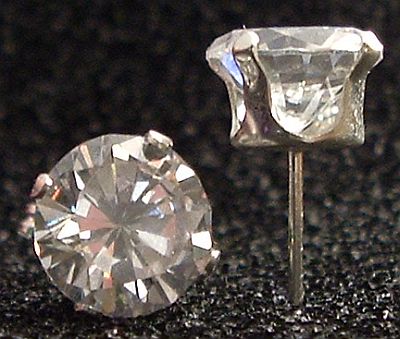
|
