TagBot™ Advanced Markup for Designers
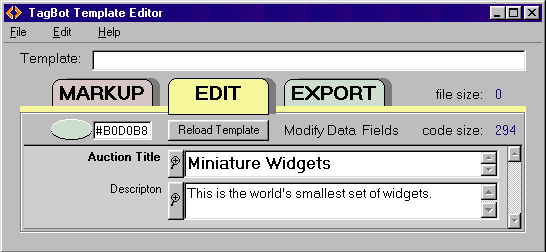
Template designers must often work closely with their customers to ensure that they use the template correctly and do not accidentally add or obliterate tags. By placing all the alterable fields on a simple edit screen, you give your customers a cleaner interface to the code and help ensure the code remains intact and operational.
Who is your Customer?
Design considerations should include your target market. If you are creating custom designs for individuals, much of the template will remain fixed, and often only the auction content (title, description, photo) will change. There are times when the customer will require a little more flexibility, such as seasonal templates, so either multiple templates could be designed or TagBot Themes could be used. Designers creating templates for a broader semi-custom market will also find themes useful.
Documenting for your Customer
Designer Templates should contain considerable commentary and instruction to the user. Some comments may be appropriate in the final HTML, and other comments would be directed to the user and should not appear in the final code. So when inserting the TagBot comments and prompts, in some cases you may want to duplicate the HTML comment:
<!-- Description starts here -->
And in other instances you might replace the HTML comment with a TagBot that won't pass through to the final HTML:
<!-- replace my URL with the URL for your own site -->
TagBot includes a special tag for comments and instructions, and it allows a very lengthy comment field. It should be used liberally to instruct the user on completing certain fields. For instance, if your template includes inline styles for paragraphs, the user should be instructed against using the <p> tag (which is not a TagBot editing option); and a <br> tag pair, which is an editor option, should be recommended instead.
Additionally, each data field has a prompt that can be customized to the field. So instead of a prompt like "Title", the designer may wish to phrase a prompt as "Main Title at top of Auction." Comments might have a prompt like "Read before you start" or "Special instructions for URLs."
TagBot Basics
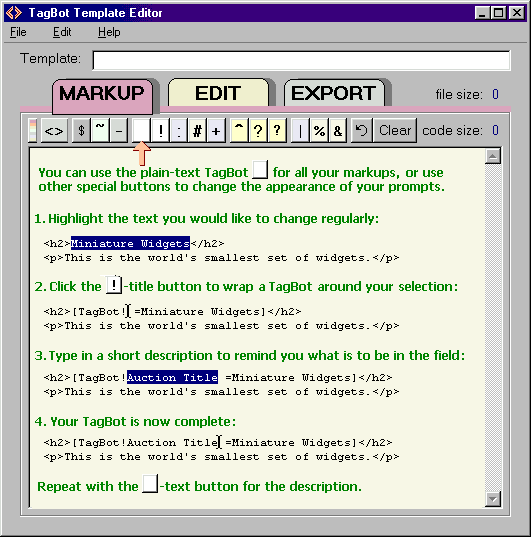
Template Designers should review Basic Markup Operations to understand the formatting requirements and use of TagBots. The strictest requirement is that the inline TagBot KeyWord be immediately followed by a Style Symbol (TagBot#). TagBots can't be nested or interleaved, but TagBots can be included within a Section Wrapper. And Section wrappers can't be nested or interleaved either. Beyond that, you can use extra spaces and, in some circumstances, line breaks to better format your tags.
Advanced Features
Here we will expand on some of the features that were briefly mentioned on the Basic Markup Operations page.
Include
The Include-TagBot (TagBot+) will retrieve a file from disk (it MUST be a disk-file operation) and will insert it's contents into the HTML code on the EXPORT screen. Designers can use this option to create and distribute subsections for a page. If the file is not found or if the field is blank with no filename, then its code is not included. This is an easy way to manage javascripts or parts of code that are subject to change. For optimal utility, the included code should be standalone and should not leave a hole in the template if it is not included. When using the Include-TagBot, the designer should provide adequate instructions for locating the file on disk if it is not delivered in the same directory as the template. The TagBot program will search for an include-file in these directories:1. The template directory (which can be anywhere on the computer)
2. The TagBot program directory.
3. The TagBot\templates subdirectory.
Of course, the Include field provides a popup window for searching for the file if it is not in one of the above directories.
Themes
Themes provide the Template designer with the broadest versatility. Themes allow users to select a single option that will affect many aspects of the template design. To understand how themes work, it is important to review and understand how Global Variables work, because Themes depend on them. In the example below, we had originally inserted a number of Global Variables (TagBot?) and worked up the template and Global Targets based on them. The Global Variable options were originally available to the user on the EDIT screen. To convert them to themes, we added the Theme TagBot at the top (pink line) and changed the second Style Symbol in the appropriate Global Variable tags to a Theme Symbol (^ circled in pink). With that change, the Global variables become hidden from the user and only the Theme is displayed on the EDIT screen.
If you use columnar formatting with the theme on the top line, then directly below each theme you can align the value associated with that theme. There must be a matching number of columns in all the Global variables that are attached to the theme. If the number of options is fewer than the number of themes, the user will experience inconsistent results with either empty values or reused values from another theme. You can follow the variable names on the left to the corresponding Global Target, color-coded in the screenshot below, that will receive the variable chosen by the theme.
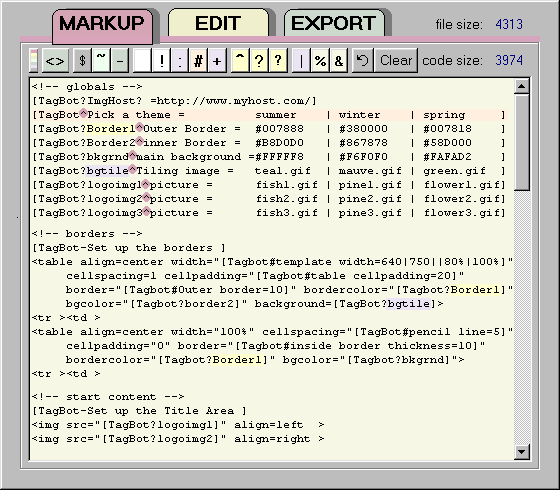
Notice that the Global Variables that would normally be available to the user are hidden when they carry the Theme Style Symbol.
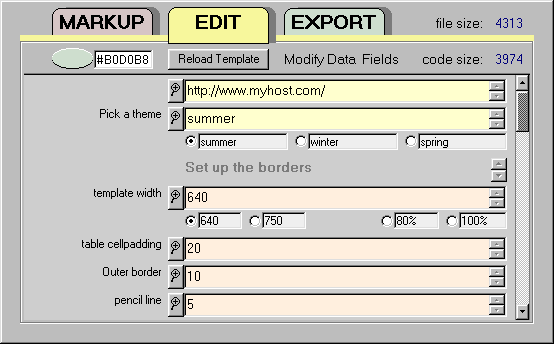
Image Chips
Displaying color options (TagBot%) and background tiles and gratuitous images (TagBot&) will make it easier for the user to envision the style of the template. You may distribute your images with the template for the user to post on their own host, or you might want to offer your own hosting of such images. When asking the user to host the images, it is wise to provide a global variable where they can fill out their own base URL for the tiles. When providing your own hosting, the base URL can be displayed as a variable field or can be hidden in the template HTML code.
If you maintain a regular set of backgrounds on your host, you may want to direct the user to your site for alternate backgrounds. Tiles that are visually displayed on a web page can be dragged onto a tile chip in the EDIT screen, and the filename will display temporarily in the text field. The base URL will be missing, so if your template already contains the base (or a slot to enter it), the tile can be used immediately. Directing the user to a download site in the TagBot Help Menu will make this process more convenient.
Images that are delivered with the template should be kept in the same directory as the template, since the image chip links will be relative and without path information. The TagBot program will search for image-chip links in these directories:
1. The template directory (which can be anywhere on the computer)
2. The TagBot program directory.
3. The TagBot\backgrounds subdirectory.
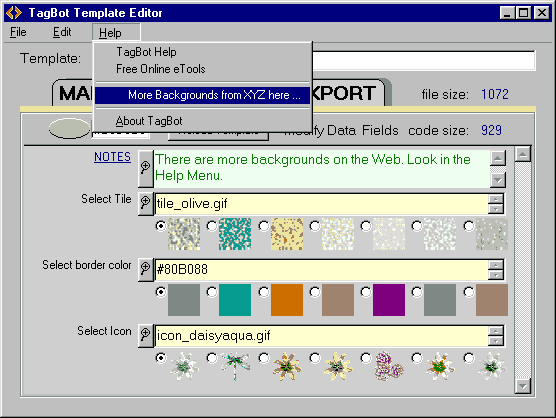
Color Chips, Image Chips, and other Multi-Option groups
The Program includes the ability to back-annotate the template. This allows more interactive development of the template and removes some of the tedium of coding option groups. Back annotation occurs when saving the template from the EDIT screen. The data that is in the input fields will be used to reconstruct the tagged template code, and pipe-separated (|) data will convert to option lists.
Start by tagging at least one item with a TagBot for the type of field you would like to display as an option group. Reload the template on the Edit screen. Then on the edit screen, add several pipe-delimited items in the selected field.
Random
The Random-TagBot [TagBot?random] is a global target that will insert the same randomly generated number at every occurrance of this tag in the HTML code on the EXPORT screen. Every view of the Export screen will generate a different random number. Random numbers are useful additions to script variables, names, and IDs, in the event multiple copies of code are generated and pasted into the same page.
Math
The Math-TagBot (TagBot() can perform very simple math operations on the values included after the (-character. The values in the math string can be numbers or can be global variables that were previously defined by a Global-TagBot. The global replacement will occur before the math is performed. A number can end with letters, but can not begin with letters. Simple math operations are performed from left to right, without regard to normal operator precedence. Parentheses will be stripped and ignored. Valid math operations are
A color can be shaded to down to black (#000000) or up to white (#FFFFFF) using a special Color Math operation (#) that separates two values. The first is the percentage to modify the color: 51 to 100 for lighter and 0 to 49 for darker. The second is a valid 6-digit hex color or a global variable name for a hex color that was previously defined by a Global-TagBot. There can be only two values in the Math TagBot, separated by the hash mark (#).
Menu Customization
Each template can carry its own references back to your site where the customer can find additional templates, icons, backgrounds, or helpful information. The Menu TagBot (TagBot$) can be embedded in a template and should carry a short caption that will appear on the help menu, along with the URL of the hyperlink. The URL should be constructed in the same manner as a URL in the browser address line. A menu item can also link to a text file that is delivered with your template, just use a .txt suffix to open the document in the user's text editor or the .htm suffix to open the browser. You may use several TagBots to add several menu items, and using a single hyphen
Scripts
Most of the common scripts can be added directly into a text field, but some javascripts contain the ]-symbol and would conflict with TagBot parsing. Those scripts can be in the body of the template without any problem, and TagBot variables can usually work just fine within those codes as long as the user doesn't introduce line breaks. But if it is desirable to make such conflicting scripts an editable input option, they should be added with the Include-TagBot.
Users always want More
Because users will always want to put something else into their template, it might be a wise pre-emptive move to insert at least one optional section in the template. Using the Section Wrapper, a single Text field would allow the user to insert any number of special add-ins and codes, without getting into the source document.
Distributing TagBot
Designers may create and distribute templates that use the TagBot program and may direct their clients to download the free TagBot program from our website, where the latest version will always be available. Designers may further find it useful to distribute the TagBot program with their templates, but in that case, we ask that you notify us, as it is important to make sure that only the latest updates are implemented and that all the support files are installed. TagBot offers the ability to private-label the program with a custom splash screen and pulldown menu options with links back your site. Private-labeling also gives the option to hide the template source code from the user during editing. Additional details.
 TagBot™